|
It’s widely rumoured that Apple is looking to make its 5G antennas for the new iPhone in 2020. The giant tech Qualcomm’s antennas might not be available in the new iPhone devices because they are not providing a sheer size of antennas as per the requirement of the company. However, it doesn’t mean that Apple will work with Qualcomm. From the reports, it is indicated that Apple might work with Qualcomm for a limited period of time only for 5G antennas but not for any other hardware of Qualcomm. Currently, there is a dispute happening for the size of the antenna. It’s because Qualcomm’s QTM525 antenna is used for faster 5G mmWave, but Apple is looking to use the sleek size of the antenna in the first place. These Qualcomm’s antennas are too large for the device of Apple. Whereas, Apple is looking forward to manufacturing their antennas for their new iPhone devices with the perfect size of fitting. For high speed of 5G internet, mmWave technology is in the primary focus, and that is why the requirement of mmWave antennas in devices is essential for better connectivity. Apple’s competitor brand Samsung has launched 5G in their newly launched device S20 and here is apple thinking what they have to do. From the Apple Company analyst, Ming-Chi Kuo predicted that the company would launch its multiple 5G devices this year. The race to provide 5G is still going on, but Apple doesn’t say anything about the 5G antennas in their new 2020 iPhone. Qualcomm is a huge brand, and they are great and complex in their work, but rumours are saying Apple will use their developed sleek 5G antennas in new devices. However, Apple has not finalized or claimed anything for making their 5G antennas for 2020 iPhone. The decision of Apple is still pending into which one they have to choose from two designs. One is thinner than Apple wants in their device, and another is thicker than Qualcomm is manufacturing. It has nothing to do with the dispute with the Qualcomm, and now their legal battle is already over. According to the current situation, Apple will look forward to making their 5G antenna because as per reports they tried to take 5G chips from Intel, but it was getting late, so they moved to the Qualcomm. As per this report, it’s clear that Apple will work with Qualcomm for a limited time just like a temporary tie-up. Dealing with Qualcomm can affect the class of royalties of Apple Company. Apple prefers to use their manufactured parts in the iPhone device, and that is why they stopped dealing with Infineon in 2011 for iPhone 7 and iPhone 7 plus. Emily Johnson is a Norton product expert and has been working in the technology industry since 2002. As a technical expert, Ava has written technical blogs, manuals, white papers, and reviews for many websites such as norton.com/setup. Source: https://ww-norton.com/apple-rumored-to-make-its-5g-antennas-in-2020/ 
0 Comments
Photos App is an important app that has been designed to help you arrange videos and photos on Windows 10. You can efficiently see the media folders via this app. You can edit it easily and also share them with your friends and family. The Photos application is much more useful than only using it for arranging the digital memories. It also comprises the great video editor same as the legacy Movie Maker that you may utilize to build videos automatically or disruption with text, songs, motion or advance features like 3D effects. If you need to use photos app video editor on Windows 10, then this post might be useful. Go through the blog and follow the instructions to execute it. How to Make Video Automatically via Photos The Photos video editor enables us to build the video projects from scratch, or you can choose media elements to permit the editor to make the video automatically. If you want to make the video automatically via Photos, then you can follow the provided steps: Launch Photos. Tap on the Video Editor button. Select menu option beside New video project option, and then tap on Make video button. Press Make a video for me button. Choose images and videos for a project. Hit the Create option. Identify the describing name for a project. Tap on OK option. Select Remix it options to modify a theme. Choose the Finish video option. Apply Video quality option in the drop-down section and then choose the quality of a video. Check Use hardware-accelerated encoding button. Select the Export option. Choose the folder to store the video project as the .mp4 document. Tap on the Export option. As the procedure completes, videos will be prepared and export, and then you can play it with the device which supports MP4 playback. You can also share with anyone via social media, mail, or else you can also upload it to YouTube so that the world can see the creation. How to Make the Video Project Manually via Photos If you want to make the video project manually via Photos, then abide by the given instructions: Launch Photos. Tap on the Video Editor button. Select New video Project option. Identify the describing name for a project. Tap on the OK option. As you complete the process, you can begin inserting content to Storyboard to continue editing projects with several options comprising duration, text, 3D effects, motion, and much more. An editor has a live preview that you may use to check procedure before sending videos. How to Add Media Elements If you wish to add media elements, then pursue the given instructions: Tap on the Add option at the top-left below the Project Library menu. Click on the From my collection button. Choose videos and photos that you need to be part of a project. Press the Add option at the top-right. Check media elements to start the video. Tap on Place in the storyboard option. You may always insert more media folders by tapping the Add option, and then you can delete files by choosing items and then tapping on Trash option at the top right. How to Add Duration When you insert media to the storyboard, you will discover that each file, including the time duration. In case you need to add duration, then you need to follow the offered steps: Click on the media element option below the Storyboard option. Tap on the Duration option from the toolbar. Choose the time duration, or identify the time range in a moment. When you complete the instructions, the element is going to play in a video in a time that you have mentioned. If you have more elements in a storyboard, you may require to perform the steps again to modify the duration for the left items. How to Add Text Follow the provided steps in order to add text: Click on the media element option below the Storyboard option. Tap on the Text option from the toolbar. Apply Text bar to add custom text. Press the text style from the options. Choose location via Layout button. Apply controls at the left to identify text duration and also preview changes. Hit the Done option. As you finish the process, the text will be added to the element, for instance, that you have mentioned. How to Add Motion Go through the offered steps to add motion: Click on the media element option below the Storyboard option. Tap on the Motion option from the toolbar. Choose the motion effect for video or picture like Zoom in right, Zoom in the centre, Tilt-up, Pan left, and much more. Apply controls at the left to preview changes. Press the Done option. As you complete the process, you may have to repeat instructions to use same or diverse motion effect to different parts of the video. How to Add Filters If you wish to add filters, then pursue the given instructions: Click on the media element option below the Storyboard option. Tap on Filters option from the toolbar. Choose any filters from the list accessible, including Adventure, Classic, Inky, Sepia, Loved, Pixel, and many more. Apply controls at the left to preview changes. Hit the Done option. When you complete the process, the filter will use for media folder. If you have several parts of a project to apply the definite filter, you have to repeat instructions for every element. Emily Johnson is a Microsoft product expert and has been working in the technology industry since 2002. As a technical expert, Emily has written technical blogs, manuals, white papers, and reviews for many websites such as office.com/setup. Source: https://emilyjohnso731.wordpress.com/2020/02/18/how-to-use-photos-app-video-editor-on-windows-10/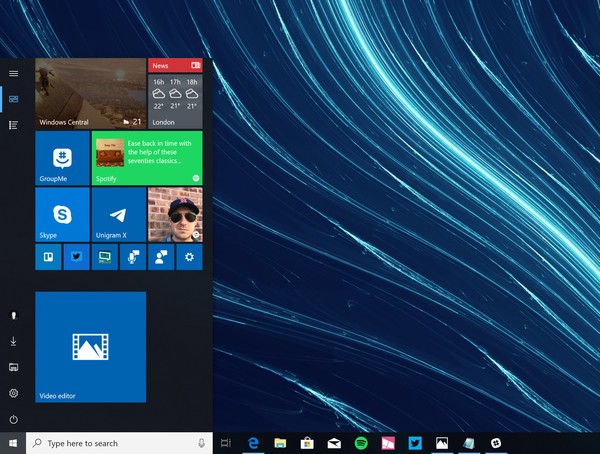 Any route planning based on Google Maps can be enhanced using the Street View. You can discover the World landmarks and get a review of nature’s beauty in an amazingly natural way. Using the Street View, users can even view inside the arenas, museums, small businesses or restaurants. You can utilize the Street view in the Google maps, Street View app or the Street View gallery. Microsoft Edge and Google Chrome browser also provide a great experience while using the feature. More importantly, the feature of the phone version acts almost the same as on the PC. Allow the Street View, and you can view the blue highlighted sidewalks, roads, and other passage that shows the complete location. These lines are visible on the map and also the Street view outlook. If you like to use the street view feature of Google Maps, then this post might be useful for you. Read through the blog and follow the instructions to execute it. How to Use Maps Street View of Google Street View in Google Maps offers users great street-level places with the pathways, including sidewalks and roads. Thus it becomes easy to see the Street View on the Maps to get the better experience of the destination and its particular locality. If you want to get the street view pictures on Google Maps, then you can follow the provided steps: Locate the place or direction on Google Maps. Move the Pegman to that place on a map. Locate the Place or Address on Google Map If you wish to locate the place or address on Google Map, then pursue the given instructions: Launch the Google Maps on the PC. Locate the place. On the other hand, you can tap the location marker on the map. Choose the picture using the Street view tab 360 images on the left. As you have completed, then navigate to the upper left. Tap the Back option. Drag the Pegman to That Place on Maps Pegman of Google maps displays at the lower of a map. Tap on it and then you will able to view the highlighted places on the map that allows you to access the Street view photos. Launch Google amps. Press the Pegman at the bottom right. Move Pegman to the place that you like to discover. Hover the cursor in a direction where you like to move around. The cursor will be visible as the arrow that displays in which direction you are moving. Leave the cursor to drop Pegman at the blue line or the orange or blue dot of the map. As you have finished the process, then navigate to the upper left. Tap on Back option. Navigate to the upper left to exit the Street View of Google Maps. Then press the Back option. In this way, you can go to the location or place that you are finding using the Street view of Google Maps. Emily Johnson is a creative person who has been writing blogs and articles about cybersecurity. She writes about the latest updates regarding mcafee.com/activate and how it can improve the work experience of users. Her articles have been published in many popular e-magazines, blogs, and websites. Source: https://emilyjohnso731.wordpress.com/2020/02/18/how-to-use-street-view-in-google-maps-to-easily-locate-the-way/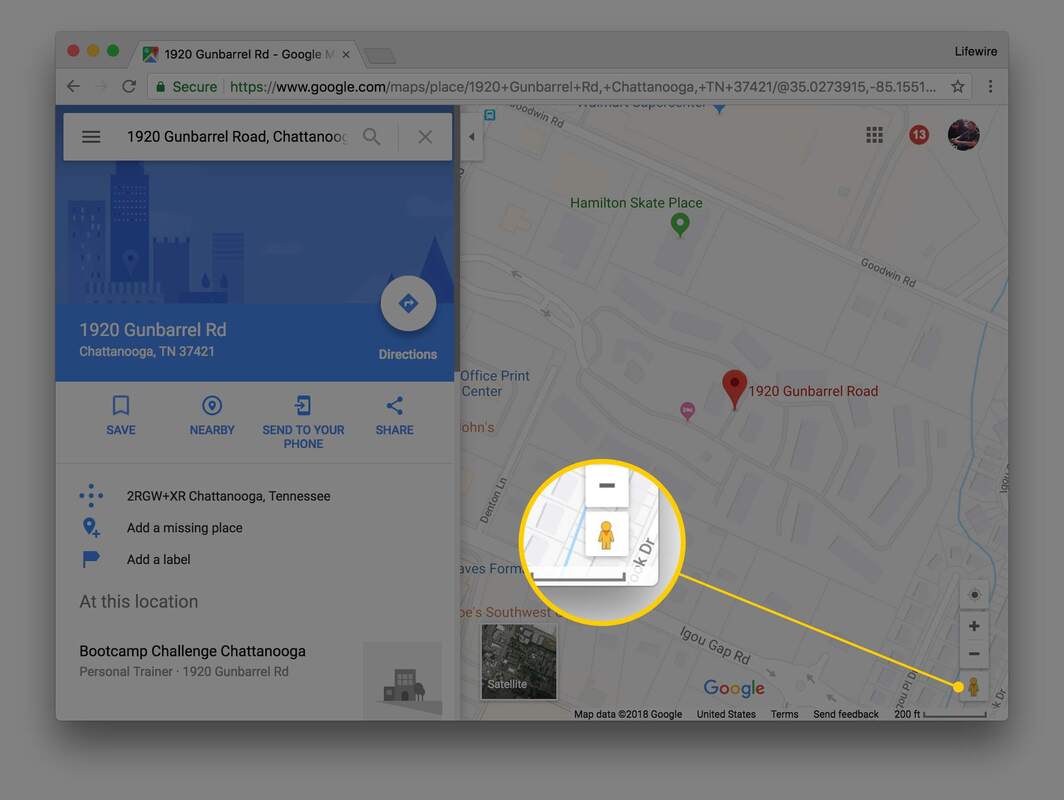 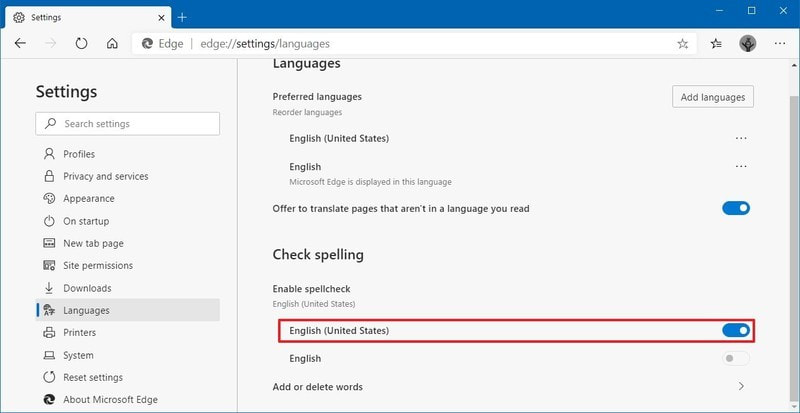 The newest version of Microsoft Edge works on the Chromium open-source with an inbuilt spell checker to make sure the necessary mails, comments, or everything you insert on the web will be sent without spell error. A spell checker is accessible in various sustain languages; however, you may also configure Edge to check the spelling mistake words in several languages.
Moreover, the dictionary is available that you can set up to avoid browser from marking specific terms as wrong. The spelling checker must be enabled by default and you can enable, check, and configure the browser through browsing settings. If you want to configure, then this post might be useful for you. Read the blog and follow the instructions to configure spell checker on Microsoft Edge. How to Enable Spell Checker If you want to enable spell checker, then you can follow the provided steps:
How to Add Spell Checker Languages If you want to add spell checker languages, then abide by the given instructions:
How to Control the Spell Checker Dictionary The latest Edge browser enables you to build the personalized dictionary to avoid marking specific words as wrong. Inserting Words to Dictionary Follow the offered steps to insert words to the dictionary:
Deleting the Terms From Dictionary In case you intend to delete the words from dictionary, then go through the below-mentioned steps:
We are discussing on Windows 10. However, these steps must work for all kinds of browsers for macOS, Windows 7, Windows 8.x, and also for Linux. Emily Johnson is a creative person who has been writing blogs and articles about cybersecurity. He writes about the latest updates regarding mcafee.com/activate and how it can improve the work experience of users. His articles have been published in many popular e-magazines, blogs, and websites. Source: https://emilyjohnso731.wordpress.com/2020/02/18/how-to-configure-spell-checker-on-microsoft-edge/ The beloved science-fiction Stranger Thingsrecenmtly dropped a teaser for the Season 4. The teaser officially revealed that Jim Hopper played by David Harbour, is not dead and he is now jailed in Russia. Recently he was shown to sacrifice his life for closing the doorway to the “other side” shown in the TV series. He also saved the whole town of Hawkins, Indiana again. Just after that, the TV show's season 3 ended with a mid-credits scene of a Russian jail where we saw a strange "American" as well as a creature from other things who was imprisoned. No doubt that the audience rapidly concluded what they watched at the end of the last season. Following the events of Stranger Things season 3, the fans have shown less interest in whether Hopper would make a return in the show or not. On the other hand, they are now showing more interest in how he handled to stay alive in the ending fight presented in season 3. Harbour is shown as coy in the whole TV show till now, and now the fact that he is returning will make a groundbreaking effect on the show. Netflix provided a glance of Hopper is living in Russia where he is imprisoned you can watch the teaser to get the idea about what's Netflix is planning for the season 4. Matt along with Ross Duffer, the Showrunners also announced regarding the beginning of the production of the season 4. It's all upon you how you gonna take it, Hopper's homecoming is either greeting news, unacceptable, or a mixture of both. He has all the time promoted many emotional belongings to the series (Be it his daughter's death). However, a few things that the TV show has gone too ahead in creating Hopper a confused character in season 3 in addition to converting him into a yank instead. In that intention, the character's return in season 4 provides Duffer Brothers with the opportunity to keep on developing him as a character as well as there was no other way to succeed the show after he died. Conversely, many fans think that Hopper's ending was shown fine in season 3 and some assume his death as a heart-touching ending to the conclusion of his journey. Enabling him to stay deceased (despite all of the hints to his return) would have been the deadly move, but possibly the more thrilling one. In the face of, Hopper is authoritatively returned, so it currently depends on the Duffers and their teammates to create his resurrection job on season 4. Moreover, by making his return and imprisoning him in Russia, could mean that Stranger Things would have to combine things up above season 3. Hopper isn't only the guy one who is missing from Hawkins in the show as recently the season 3 concluded with Joyce Byers, and her kids Will & Jonathan, as well as the adopted daughter of Hopper, Eleven. This indicates that the entire squad will be split apart in the season 4. Emily Johnson is a creative person who has been writing blogs and articles about cybersecurity. He writes about the latest updates regarding mcafee.com/activate and how it can improve the work experience of users. His articles have been published in many popular e-magazines, blogs, and websites. Source: https://emilyjohnso731.wordpress.com/2020/02/17/hooper-is-alive-confirmed-by-stranger-things-season-4-teaser/  |
